Showing posts with label ergonomics. Show all posts

Saturday, January 13, 2007

Thinking On Your Feet


There are some students who just cannot contain their bodies sitting in a chair. Their attention suffers as they writhe and wiggle through lessons. In response, try to provide standing stations in the classroom. Find a counter or table high enough to accommodate the standing student. You can add a slanted desktop or large three ring binder as a surface. It is amazing to see the effect this has on their performance!

The idea of standing to work is popping up all over. The European work community offers this option to its workers by providing sit-to-stand desks (changing levels with a touch of a button).

The company Levenger offers sit-to-stand products in its current catalog. These include podiums, laptop lifters and desk risers. Adjustable desks are available at Relax The Back stores.

James Levine, MD, PhD, professor of medicine at Mayo Clinic, has developed a classroom of the future. What is missing from this classroom? Chairs! Conventional desks are swapped for standing desks which are similar to small adjustable podiums. The sitting is replaced by movement. The students stand, kneel or sit on exercise balls to work.

Breaking tradition has happened before. Do you remember the old desks with attached chairs? Instead of cup holders, they were equipped with inkwells. Change is possible! Having standing options in the classroom is a step forward, providing each student what he/she needs to be successful.

By the way, I am told that Winston Churchill preferred to work standing up.

Wednesday, October 11, 2006

Vertical Surfaces


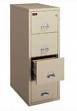
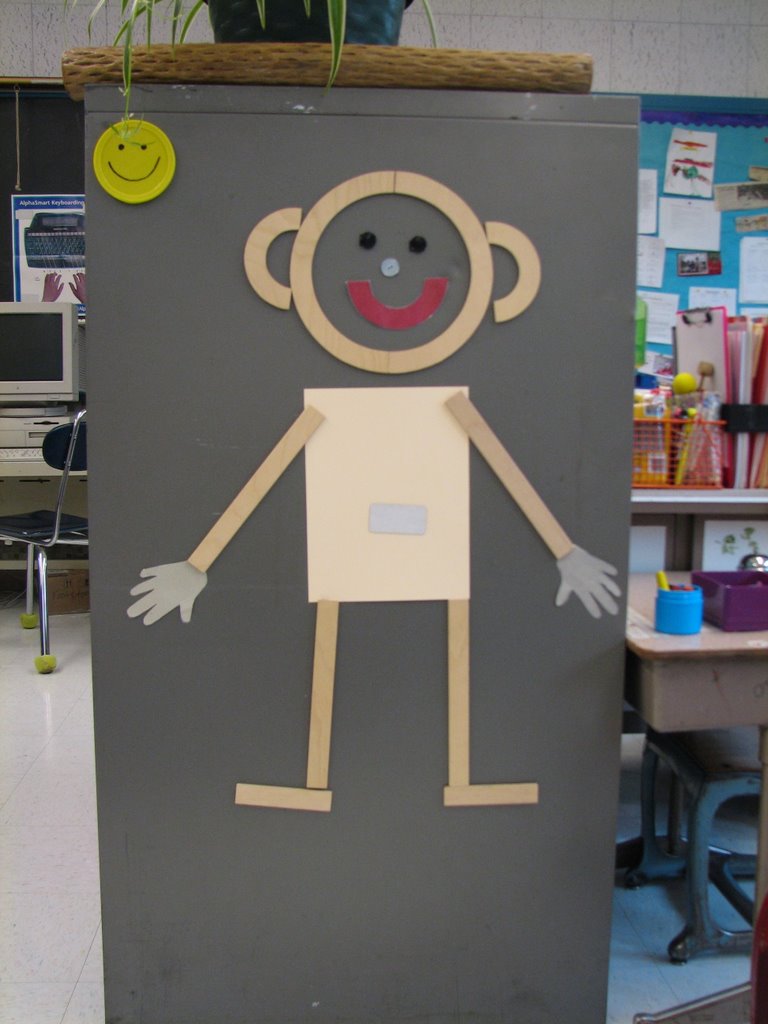
Look around for vertical surfaces at home and in your classrooms. A common one in the classroom is a large filing cabinet...ideal for students to stand and work on magnetic activities. At home, use the refrigerator or back of a door.


Thursday, September 14, 2006

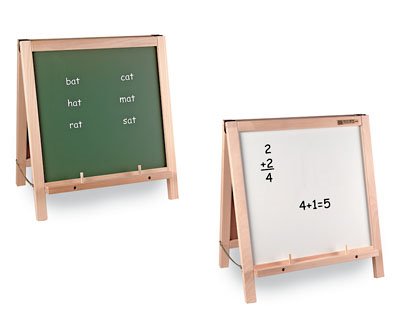
Easels...not just for reading


Tabletop easels are one of the greatest tools to increase upper arm strength and stability, hand and wrist positioning, and fine motor control.

When you use an easel to write or paint on, your body calls upon a whole different set of muscles than if you did the activity flat on a desk.

TRY IT OUT... Hold a book or clipboard up on an angle (45 degrees or so) with the base of the book/clipboard resting on the table. Now write something.

Next, put the paper flat on the table and write the same thing. See how different that feels?

Do it again and pay attention to which muscles you are using and how your hands, wrists and upper body are positioned differently. These differences are precisely the aspects we want to target when developing upper arm stability and control!

Tabletop easels not just for propping up materials to read. Use them for a variety of activities. Try wikki stiks, magnetic letters, pegboards, magnadoodles, and small chalkboards. The ideas are endless!

Tuesday, March 07, 2006

Cool School Tool - slant board

The muscles of the hand are divided into power muscles and precision muscles. The precision muscles (needed for writing) work better when the wrist is extended. Notice students who write with their wrist bent. They are probably experiencing muscle fatigue. Writing on a slanted surface is a good solution. Architects and artists often use an inclined surface. There are slanted clipboards that provide this function, but let's think along the lines of reinvention and reuse. Any 3-4 inch three ring binder makes a great slanted surface for a student's desk. Try it out!

Tuesday, November 08, 2005

Computing for Kids

Children are spending more and more time on the computer. This can cause repetitive stress injuries. It is recommended that you do a quick 2 minute stretch every 20 - 30 minutes. Now you can make your school computer ergonomic friendly. Stretch Break for Kids By Para Technologies is free software that will run in the background and prompt youths to stretch at timed intervals as well as provide ergonomics hints. Check out our links to download your free copy now!

Thursday, October 13, 2005

Now that it fits, get out of that desk!


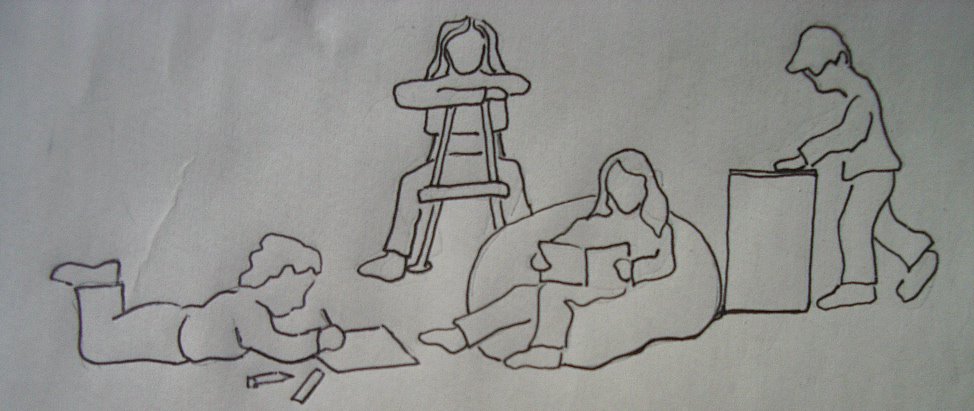
After all that talk about good seating and positioning for school function, let's get the students out of their desks! Our bodies were not made to sit for extended times. Did you know that Winston Churchill did much of his work while standing at his desk? Let's explore some alternate positions for school work.

Standing - Choose a tall counter for a work area. Some students have more attention while standing.

Sitting backwards on chair - This puts the body in a forward leaning position, ideal for writing. It also is a good position for squirmers because it "grounds" them.

Lying prone on the floor (often seen in Hosmer hallways or on rugs in classrooms) - This is a geat position for several reasons. First, it stabilizes the forearms so that the hand muscles (not arm) are used for writing. Secondly, it encourages visual attention.

Sitting in a beanbag chair - This provides a comfortable, supported seating option. Great for writing with a clipboard or typing on an AlphaSmart.


If students need to be in a desk for longer than 20 minutes, do a few quick stretches. Yoga poses, chair push ups, and brain gym "tune ups" are some examples. Check in with OT/PT staff for ideas and resources.

"Clip art licensed from the Clip Art Gallery on DiscoverySchool.com"

But what about tables?


Now that you have adjusted individual desks, what do you do about tables? This can be tricky since they accommodate any number of children. If you have more than one table, you can make them different sizes (one for larger students, one for smaller students). Again, start with chairs that would fit this particular group. Then adjust the table top to be at the height 2 inches above the student's bent elbow when sitting.

If you have multisized students and only one table, fit the table to the larger students (not the adults in the room, however). Then provide foot stools to accommodate the smaller students.

It is so important for feet to be firmly planted on the ground. Come by the OT/PT room and ask for a phone book. When wrapped in ducktape with nonslip material on the bottom, they work quite well as footstools.

Monday, September 26, 2005

Desk/Chair Size


Are the desks all the same size in your classroom?  If so, look at your students.  Have you ever seen such a variety of body shapes and sizes? When it comes to desks and chairs, one size does not fit all!

The chair and desk are the most used items in the classroom.  Just think of the amount of time a student spends at his/her desk.  A little time spent now making adjustments will have big pay offs in attention, written output and overall endurance.  

Look at your students during any desktop task.  Are they sitting on their legs, in order to raise their bodies up? Are their elbows out to the sides with their heads resting on the desktops?  Are their shoulders hiked up as they write?

Chances are that their desks are too high or their chairs are too big.  How do you know what is "just right" if you are not Goldilocks?

Start with the chair.  Feet should be flat on the floor with hips and knees at 90 degree angles. If feet do not rest firmly on the floor, 100% of the student's body weight is supported by a 4 square inch area!  Students should be able to sit with their back touching the back of the chair (be careful of seats that are too deep).  

Once you have the correct chair, check the desk height.  Many students have their arms in a wing position out to the side.  Too high!  The desk top should be 1-2 inches higher that the bent elbow.  


To make adjustments to most Hosmer desks, you only need a large phillips head screw driver (one screw on each desk leg).  Hint...It is a great wrist/hand strengthening activity for the student!    


Check out our new link, Ergonomics for Home and School for an informative article "Everything You Should Know About Ergonomics and Youths, But Were Afraid to Ask." Scroll down to the sections on school workspace and school computer workstations. Families might be interested in sections on homework space, home computer workstations, television and video games, fitness, sports and performing arts.

Tuesday, September 20, 2005

Backpack Awareness

"Pack it Light, Wear it Right!"

* Aching back and shoulders
* Tingling arms
* Weakened muscles
* Stooped posture

Does your child have these symptoms after wearing a heavy school backpack? Carrying too much weight can lead to pain and strain. How much weight is too much to carry?

A student should never carry more than 15% of his/her body weight. That means a child who weighs 100 pounds shouldn't wear a loaded backpack heavier than 15 pounds.

Strategies for parents and students:
Loading a backpack:
- Load the heaviest items closest to the back (the back of the pack).
- Arrange books and materials so they won't slide around in the backpack.
- On days the backpack is too loaded, your child can hand carry a book or other item.
- Empty out all unnecessary items...don't let it become a dumping ground!


Wearing a pack:
- Both shoulder straps should always be worn. Wearing a pack slung over one shoulder can cause a child to lean to one side, curving the spine and causing pain or discomfort.
- Select a pack with well padded straps. Shoulders and necks have many blood vessels and nerves that can cause pain and tingling in the neck, arms, and hands when too much pressure is applied.
- Adjust the shoulder straps so that the pack fits snugly to the child's back. A pack that hangs loosely from the back can pull the child backwards and strain the muscles.
- The bottom of the pack should rest in the curve of the lower back. It should never rest more than four inches below the child's waistline.